This is the long awaited update to reese’s local server creation guide.
While it’ll be mostly similar, broken/old steps were fixed/updated to work normally with the master branch.
As stated in the original post, this tutorial is for Windows ONLY. Running it on Linux/MSYS2 is not possible at the time of posting.
What you’ll need:
- Python 3.6 (Python Release Python 3.6.8 | Python.org, 3.7+ do not work)
- Visual C++ Build Tools
- Git for Windows (Git - Downloading Package, optional, only use if you get stuck at requirement installation)
Download and install Python 3.6. Make sure to add Python to PATH during the installation.
After installing Python, install Visual C++ Build Tools to fix the HLL error and install all dependencies properly.
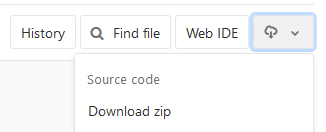
Then download the server’s master branch (located at Files · master · Escargot / Escargot Server · GitLab) as a zip archive and extract its contents to somewhere, preferrably Documents.
Now you’ll need to add a system variable. Navigate to Control Panel/System and Security/System/Advanced system options and add a system variable named PYTHONPATH. Set its value to the local server folder’s current path.

And it’s Python time. CD to the local server folder using Command Prompt, then run python -m pip install -r requirements.txt to install all server dependencies(If it continuously fails during requirement installation, install Git for Windows and run the commands on Git bash until phyton dev to fix that). Then run python -m pip install pycryptodome to install pycryptodome.
You’ll also need to add settings_local.py in the root of the local server folder.
Now run python script/dbcreate.py to create user databases. If you get an error for the db module missing, install it. Next run python script/dummydata.py. If the script hangs for more than 10 seconds, interrupt it(Ctrl+C).
Then run python script/user.py emailhere@service.com to create a user. After you run the command, insert the password needed for the user(the password will stay invisible as you type). You can repeat this command to add as many users if you want to run multiple WLM processes and talk to yourself (You’ll need MSN Polygamy).
Now you’re done with the Python stuff. Download the Windows Live Messenger 2009 and Windows Live Communications Platform packages and install them. Quit WLM for now.
Then go into the HOSTS file (located in C:\Windows\System32\drivers\etc) and add these lines:
127.0.0.1 m1.escargot.log1p.xyz
127.0.0.1 messenger.hotmail.com
127.0.0.1 login.live.com
127.0.0.1 gateway.messenger.hotmail.com
127.0.0.1 byrdr.omega.contacts.msn.com
127.0.0.1 config.messenger.msn.com
127.0.0.1 tkrdr.storage.msn.com
127.0.0.1 ows.messenger.msn.com
127.0.0.1 rsi.hotmail.co
Remember that if you want to use any official Microsoft services after testing the server, add a # to the beginning of 127.0.0.1 login.live.com to disable it.
Save your changes to HOSTS and close it.
You can now run python dev through Command Prompt(not Git bash) to run the server. A cerfiticate will be generated the first time the command is run (located in .devtls_cache\DO_NOT_TRUST_DevTLS_Escargot.crt).
Install it to the Trusted Root Certification Authorities as shown below:
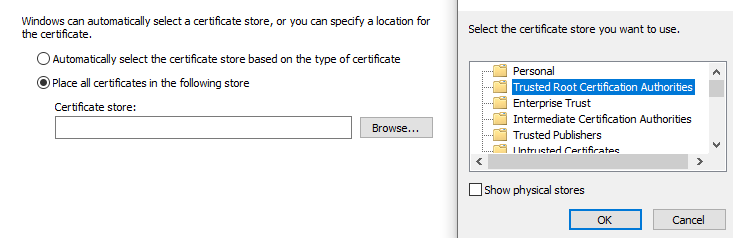
After you install it, run the command again and the server should start running.
(If it errors out instead, make sure to check for any running VMWare/Virtualbox networking processes and terminate them.)
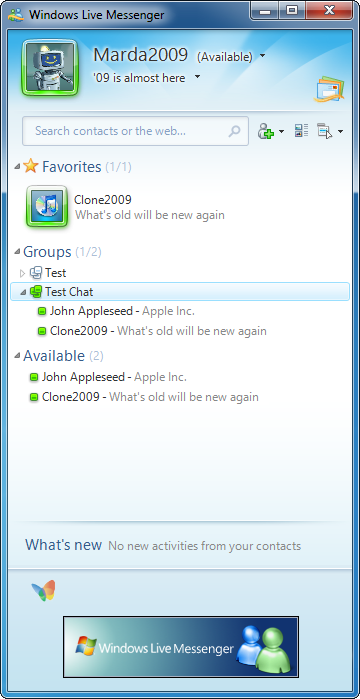
Start WLM '09 and attempt to log in using any of the accounts you created. If you managed to log in with no issues, your server works!
Also to clarify that port forwarding your server IIRC doesn’t work and only runs on LAN. You can only use another computer, use MSN Polygamy to use multiple WLM windows, or use a tunneling software like Hamachi.
If you have any issues, let me know and make sure the check out the original thread as there’s many useful info there.
Enjoy your long awaited update!
EDIT: Python 3.8 seems to have deprecated funcli.py altogether, thus rendering it incompatible with the local server, and the replacement funcli.py does not work.
If you have anything higher that 3.6, you’ll need to uninstall that and install 3.6 instead to make the local server function.
EDIT 2: WLM ‘09 support is right around the corner now that the server supports MSNP18 and there’s only patching and database migrations left to do, so at this point, it’s just better to wait.
EDITS 3-15: Cleaned up the post and added some updates.